This is a review written by a dear friend and runner. Thanks Bern for writing this guest blog!
A balaclava is a winter hat with face protection. It can be worn three ways: over your head and lower face, over your head and under your chin, or just around your neck.
My balaclava is from Brooks Running. It’s made of a polyester/spandex fabric that is ultra-light but very warm, and it does a great job of wicking the moisture away from my skin. The manufacturer’s specs rate it for 40-60 degrees (Fahrenheit), but I find it’s too warm to wear under those conditions. However, it’s perfect for cold, blustery days and it’s quickly become my go-to winter accessory.
MSRP $24.95
Features & Benefits:
- 3M™ Scotchlite™ retroreflectivity increases front and rear visibility in low-light conditions
- Contoured shape with slight stretch
- Flat seam construction
- One size fits all
- Fitted: Snug to the body throughout the garment
- Built for 40° to 65°
- 88% polyester/12% spandex jersey

If you’re not into the all-in-one convenience of a balaclava, a neck gaiter might be more your style. A neck gaiter is exactly what you might think – a tube of fabric that slides over your head and is worn around your neck. Depending on how snug the fit is, a neck gaiter can be pulled up around your lower face for added protection on very cold days.
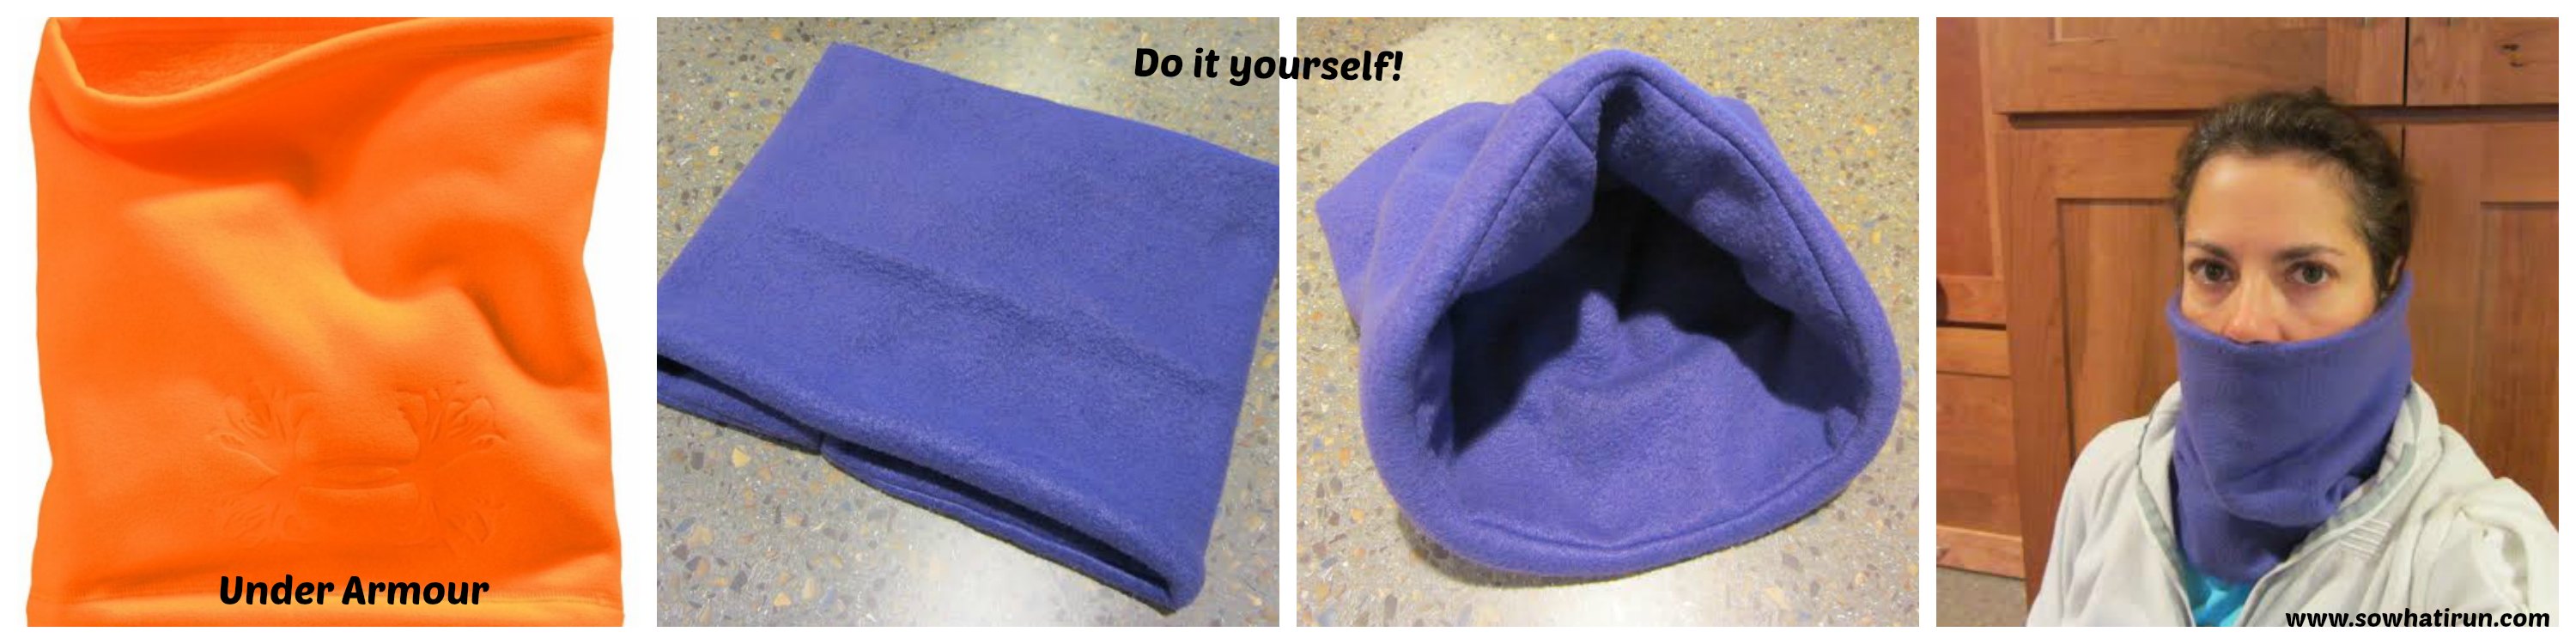
Most sports apparel manufacturers offer neck gaiters in a variety of fabrics, for about $20. Under Armour makes a nice fleece neck gaiter, which I like for running, shoveling snow, and winter wear in general.
If you’re a crafty sort, you can make a neck gaiter pretty easily. I bought a fleece remnant at the local fabric store and created one in under an hour. Now, the fleece I used doesn’t have the same wicking properties as I might get from the UA gaiter, but it does the job (and at a fraction of the price).
Want to make your own? You’ll need a piece of fleece approximately 20” x 25” and a way to sew it together (sewing machine or needle and thread…your call). Fold the fleece so it’s 10” x 25” and sew the long edge together so you have a 25” tube. Trim the sewn edge close to your stitching, then turn the fleece right-side out so the stitching is inside the tube. Sew the short edges of the tube together, and you’re all set! If you prefer a flat seam, you can top-stitch the raw edge.